")
This process is also known as tethered shooting or tethered photography. This technique helps many professional photographers. tethering allows you to connect your camera to a Laptop. on the same time, you can see the live view of your DSLR screen on your laptop and instantly view your digital images after it is captured. If you go for an external monitor for your DSLR it is quite expensive but tethering technology became significantly cheaper and easier to use.
If you’ve ever been Inquisitive about tethered shooting, this article will give an overview briefing of the process. I will explain your step-by-step.
let’s start.
In this process you have to connect your DRLR to a Laptop by data cable or wi-fi. After a successful connection you can see your DSLR screen on the Laptop .it can mostly help that person who takes selfie video or photo shoot. After your photo/video shoot you can direct save your photo/video on laptop for post-production.
What you need for this Process
Cable connection from device to laptop is a traditional process.so for connection of your DSLR to laptop, you need a data cable. But you have to use the data cable according to your DSLR. There are a variety of different cables and ports available like mini-usb, micro usb to usb.you can also connect via Wi-fi, if your DSLR support wi-fi. After that you need a software like Canon EOS Utility 3. Now it’s ready to connect.
In this particular scenario if you connect your DSLR to Laptop by a datable you will need
- A data cable (it should be a good and long data cable)
- Software like Canon EOS Utility 3
- A laptop stands or a table for your Laptop(optional)
Step-by-step process
1.You have to search the Canon EOS Utility 3 from google. Download it from canon official site. After the successful download you have to unzip that file. Now you get the proper installation file. its time to install. In every software there are some form to fill-up or choose some options, same on Canon EOS Utility 3.you have to choose the location and country after that you just click on next and next. Total installation process takes some time for the successful installation. You have to take patience.
2.Now its time to connect your DSLR to laptop by data cable. first connect the data cable to your DSLR then connect to Laptop. Recheck the connection again. Then switch on the DSLR you can see a laptop symbol your DSLR display. On the same time, you can see Canon EOS Utility 3 software will automatically start running.
You can get a screen and you have to choose one option out of three.
1.Download images to computer
2.Remote Shooting
3.Camera Settings

Here you have to choose the second one Remote Shooting. After click the same you will get an interface screen. The display gives you the ability to alter some settings such as white balance or drive mode on your camera directly from this interface, but there are still some functions, such as lens zooming, that you’ll have to do manually.
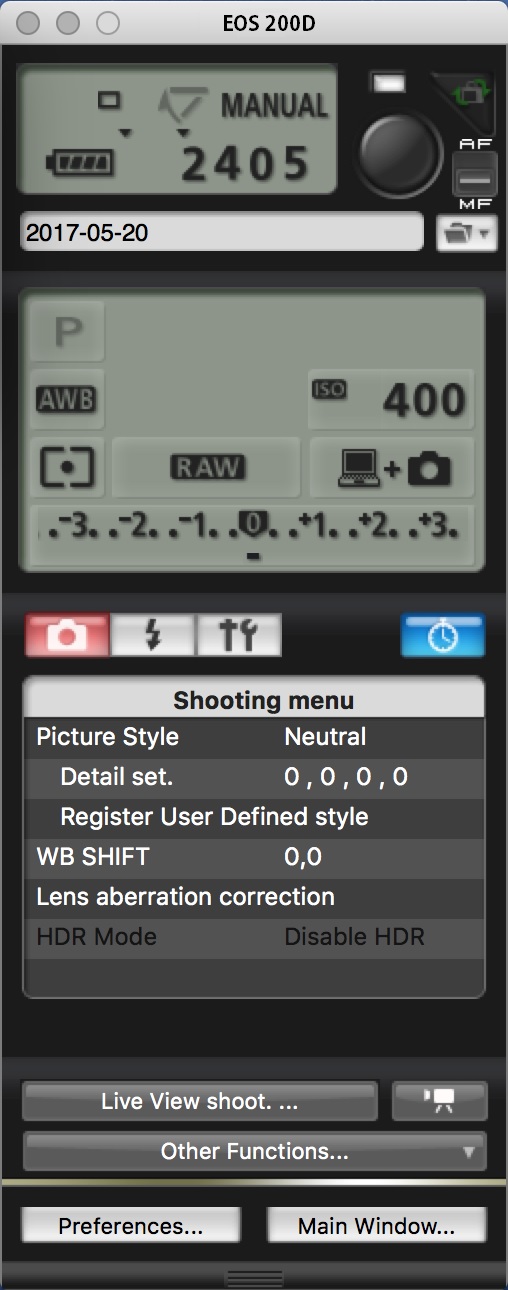
3.After some time on Remote Shooting setting of EOS Utility 3, you can see the Live View mode of your camera, and tethered shooting will be enabled. In this case, Live View will appear directly on your computer screen so you will see exactly what your camera sees. When you take a photo or shoot a video, the captured photo/video will appear on your Laptop.

Nice article keep sharing your knowledge with us
Hello, just wanted to say, I loved this post. It was funny. Keep on posting!| а
Im thankful for the blog. Thanks Again. Really Cool. Jayne Jessee Osyth
Way cool! Some extremely valid points! I appreciate you writing this post and the rest of the website is very good. Gayleen Waylen Lumbard